Book, Music and Lyrics by Michael Berkeley
Run Time: 60 min
Cast: 8 Principals, Ensemble 4-40
Orchestration: Piano, Bass, Drums, Guitar/Banjo
Tracks Available
Set Requirements: Unit Set
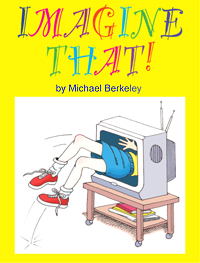
A new musical celebrating the joy of turning off the TV and turning on your imagination!
IMAGINE THAT! is the story of the Tubesons, an American family who have become slaves to their television. When their TV breaks down and their daughter Molly is snatched into the TV by a television demon, their lives take a magical and adventurous turn for the better. Their only hope of rescuing Molly is to heed the advice of the Fairy TV Repairperson and rediscover their imaginations!


Past Productions
Guzart Teatro
Cancun, Mexico
SCERA Center for the Arts
Orem, Utah
St. Vincent de Paul School
Omaha, Nebraska
Hoboken Children’s Theater
Weehawken, New Jersey
Dakota Prairie Regional Center for the Arts
Rockford, North Dakota
FHCT Youth Theater
Fountain Hills, Arizona
Connecticut Family Theatre
West Hartford, Connecticut